Table of Contents
ToggleIntroduction to Restoring Your Mac with OpenCore Legacy Patcher
Sometimes things just don’t go as planned—whether it’s a buggy macOS update, unexpected system error, or you’re simply ready for a fresh start. If you restore Mac with Opencore Legacy Patcher, it can help you get everything back in shape.
And if you’re using OpenCore Legacy Patcher (OCLP), you’ve got the flexibility to make it all happen—even on those older, unsupported Macs.
Understanding How OpenCore Enables Restoration
OpenCore isn’t just a patching tool—it actually acts as a bridge between your older Mac and the latest macOS. When you need to restore your system, OpenCore allows you to boot into modern installers, access recovery tools, and perform clean reinstalls—just like Apple intended (but didn’t allow for your Mac’s model).
What You Need Before You Begin
Before diving into a system restore, always back up! Use Time Machine or a trusted backup tool to save your important files, apps, and settings. An external drive with enough space will be your best friend during this process.
Confirming System Compatibility with OpenCore
Not every Mac works with every version of macOS, even with OpenCore. Make sure your model is listed as compatible on the OCLP GitHub or documentation. This saves you time and avoids errors when restoring your system.
Because Your Mac Still Has More to Give—OpenCore Makes It Happen!
Ready to Patch? Take Control of Your Mac’s Future Today!
Creating a macOS Installer
Downloading macOS via OCLP
With OpenCore Legacy Patcher, downloading macOS is super easy. Use the built-in downloader to fetch the installer directly from Apple’s servers. Just choose your desired macOS version, and OCLP will handle the rest.
Building a Bootable USB Installer
Once downloaded, you’ll need a USB drive—preferably 16GB or more. Use OCLP or Terminal commands to create a bootable macOS installer. This step prepares your Mac for a smooth and clean reinstallation, even if your current system isn’t working.
Reinstalling macOS Using OpenCore
Booting from the USB Installer
Plug in your bootable USB and restart your Mac. Hold down the Option key during boot to bring up the Startup Manager. Choose the USB drive that says “Install macOS,” and let the magic begin.
Navigating macOS Recovery and Installation Steps
From here, it’s familiar territory. You’ll see the macOS Utilities window—just like any other Mac install. Use Disk Utility to format your drive (if you’re doing a clean install), then select “Install macOS” and follow the prompts.
Restoring Data from Time Machine or Backup
Once your fresh macOS is installed, it’s time to bring back your files, apps, and settings. Migration Assistant makes this super easy. Just connect your Time Machine drive, launch Migration Assistant (it usually opens during setup), and choose what you’d like to restore—user accounts, applications, or full system settings.
Manual File Transfers and App Reinstalls
If you didn’t use Time Machine, no worries! You can manually copy files from your backup drive. This is a great chance to skip unnecessary clutter and only bring back what you need. Reinstalling your favorite apps fresh from the internet or App Store ensures everything is up-to-date.
Rebuilding OpenCore After Restoration
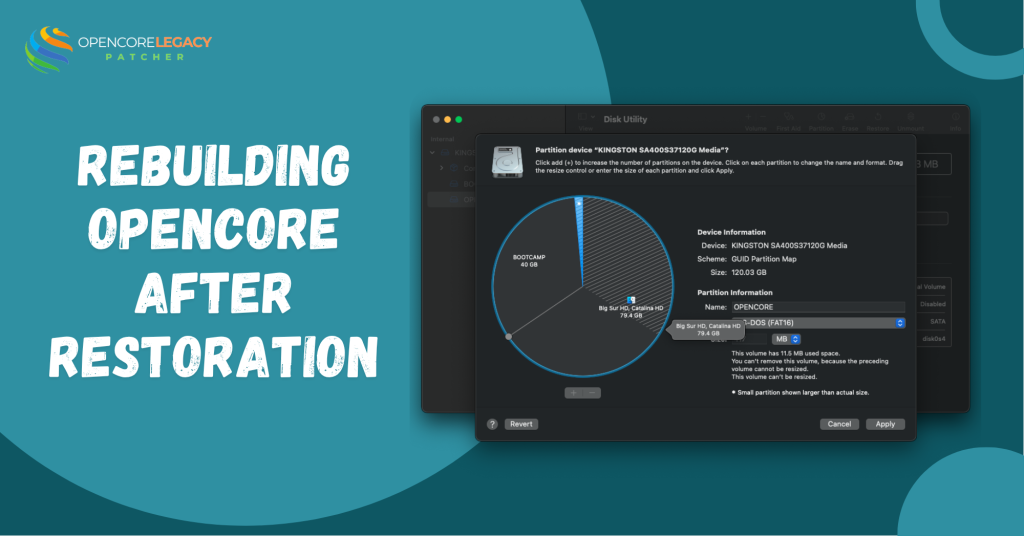
Restoring your Mac wipes everything, including the EFI partition where OpenCore lived. You’ll need to run OpenCore Legacy Patcher again and rebuild the EFI folder. Use the “Build and Install OpenCore” feature and install it to your internal drive so your Mac knows how to boot with the patches again.
Running Root Patcher for Full Hardware Support
Once OpenCore is installed and your Mac boots into macOS, it’s time to patch your system again. This restores support for missing graphics acceleration, Wi-Fi, trackpad functionality, and more. OpenCore Legacy Patcher will prompt you to run the post-install root patcher—click through and let it work its magic!
Common Issues During Restore
macOS Installer Errors
If the macOS installer gives you trouble, like failing midway or showing “macOS cannot be installed,” double-check your USB installer and disk format. Use Disk Utility to reformat the internal drive as APFS and try again. Also, ensure your macOS version is supported by your Mac and OpenCore version.
OpenCore Not Loading or Missing EFI Boot Option
Sometimes after restoring, your Mac may not show the OpenCore option at boot. This usually means OpenCore wasn’t installed properly on the EFI. Reopen the Patcher app, rebuild OpenCore, and install it again—make sure you’re targeting the right disk. Don’t forget to reset NVRAM if the boot option is still missing.
Final Setup and Optimization
After everything’s installed and your files are back, give your Mac a quick checkup. Is the Wi-Fi working? How about graphics acceleration and keyboard brightness? If something feels off, it might mean you need to rerun the root patcher to enable full hardware support again.
Checking for Post-Restore Updates
Don’t forget to check for updates! Whether it’s macOS updates or a newer version of OpenCore Legacy Patcher, keeping your system current ensures a smoother and more secure experience. Launch System Settings and see if there’s anything new waiting for you.
If everything works fine, great, you just changed macOS with OpenCore Legacy Patcher
When to Consider a Clean Install
Signs You Should Start from Scratch
Sometimes, restoring can carry over little bugs or glitches from your old setup. If your Mac feels slow, apps keep crashing, or you’re seeing weird errors, a clean install might be the refresh your system needs. It’s like giving your Mac a fresh start with zero baggage.
Backing Up Before a Fresh Start
Before you wipe everything, make sure you’ve got your essentials backed up—documents, photos, and those important apps. Use Time Machine or drag everything to an external drive. You’ll thank yourself later for being cautious.
Conclusion: Bringing Your Mac Back to Life with OCLP
OpenCore Legacy Patcher is such a powerful tool for keeping your older Mac young and lively. Whether you’re restoring from a hiccup or just refreshing your system, OCLP helps unlock the full potential of unsupported Macs.
With the right steps, a little patience, and a proper backup, your Mac can shine again—no USB drama, no outdated performance. Just smooth, modern macOS running on your trusty machine!
Hack the Limits—Unleash the True Potential of Your Mac with OpenCore!
Modern macOS + Vintage Hardware = Magic. Experience It with OpenCore!
FAQs
Can I restore macOS with OpenCore installed?
Yes! You can reinstall macOS while OpenCore is installed, but you may need to rebuild OpenCore afterward.
Do I need a USB installer to restore my Mac with OCLP?
Usually yes—especially if you’re doing a clean reinstall. It ensures you can boot into recovery even if your internal setup fails.
Will I lose my files during restoration?
Not if you’re restoring over an existing install or using Migration Assistant. But always back up, just in case.
Can I use Time Machine to restore after reinstalling macOS?
Absolutely! Time Machine is one of the best ways to get your data and settings back after a fresh install.
What if OpenCore doesn’t show up after restore?
You likely need to reinstall it on the EFI partition and reset NVRAM. Easy fix with the OCLP app.
Do I need to rerun Root Patcher after restoring macOS?
Yes, especially if you notice missing features like Wi-Fi, graphics acceleration, or audio.
Is restoring different from reinstalling macOS?
Yes. Reinstalling macOS is part of the restore process. Restoring usually includes getting your data and apps back too.
What macOS versions can I restore using OpenCore Legacy Patcher?
That depends on your Mac model, but OCLP supports versions like Big Sur, Monterey, Ventura, and even Sonoma on many older Macs.
Read More:
- Wi-Fi or Bluetooth Not Working After Using OpenCore Legacy Patcher? Here’s the Fix
- Fix GPU & Graphics Issues on Older Macs Running Sonoma/Sequoia with OCLP
- Mac Slow After OpenCore Legacy Patcher? 12 Fixes That Actually Work
- Is macOS Tahoe Supported on OpenCore Legacy Patcher? Compatibility Guide
- How to Enable iMessage and FaceTime with OpenCore Legacy Patcher

