Introduction to Updating macOS with OpenCore Legacy Patcher
Upgrading your macOS can feel impossible on an older Mac, right? That’s where OpenCore Legacy Patcher steps in like a total tech fairy godmother. It gives your outdated Mac a fresh chance to enjoy the newer macOS features that Apple may have left behind.
Why Updates Are Important for Older Macs
To Update macOS with OpenCore isn’t just about getting new features; it’s also about staying secure. Updates patch up vulnerabilities, improve performance, and keep your apps happy and running smoothly. Without regular updates, even a great Mac can start feeling slow and left out.
How OpenCore Legacy Patcher Makes Updates Possible
Most older Macs get cut off from updates because Apple ends support. OpenCore Legacy Patcher swoops in and fills that gap! It unlocks the ability to install and run newer macOS versions, even on Macs that Apple says are “too old.” It’s like giving your Mac a makeover, new life, new style, same trusty machine.
What to Know Before You Start the Update
Before jumping in, let’s make sure your Mac is ready for a smooth update. Trust me, a little prep work now can save you from a headache later.
Compatibility with Your Mac Model
Not every Mac is a fit for every macOS version, even with OpenCore Legacy Patcher. Check the official support list on their GitHub page to see if your Mac model is included. It’s super helpful and usually kept up to date by the community.
Supported macOS Versions and Requirements
Depending on your Mac’s specs, you might be able to run anything from Big Sur to Sonoma. Just make sure your storage space, RAM, and firmware are ready for the jump. Some newer macOS versions require metal-compatible graphics cards or extra tweaks, so double-check that too!
Preparing Your System and Backups
Before doing anything big, especially updates, make a Time Machine backup. Or clone your system with a tool like Carbon Copy Cloner. Backing up gives you peace of mind in case something goes wrong, and it makes it easy to roll back if you change your mind later.
Downloading the Latest OpenCore Legacy Patcher Version
Now it’s time to get your hands on the latest version of OpenCore Legacy Patcher! But don’t just grab it from anywhere; this tool is powerful, and you want the safest version.
Where to Find Safe and Updated Builds
Always download OpenCore Legacy Patcher directly from its official GitHub repository. That way, you’ll get the most recent release, full of bug fixes, new support, and security updates. Stay away from third-party sites; those can be outdated or even risky.
Choosing the Right Version for Your macOS
Each release of OpenCore Legacy Patcher is tailored to specific macOS versions. Whether you’re updating to Ventura or Sonoma, make sure the patcher version matches your goal. Check the changelogs and documentation to pick the one that suits your update plan best.
How to Update macOS Using OpenCore Legacy Patcher
Ready to give your Mac a fresh update? With OpenCore Legacy Patcher, you can install the latest macOS,even if Apple says your Mac is too old. Let’s go step-by-step and make sure everything goes smoothly!
Step-by-Step Update Instructions
Start by opening the OpenCore Legacy Patcher app and checking for the latest patcher version. Make sure you’re using the right one for your target macOS. Once you’re set, go to System Preferences > Software Update and begin downloading the new macOS.
After the update installs, your Mac might reboot a few times. Don’t panic! That’s normal. Just make sure your OpenCore EFI is properly mounted, especially if you’re using a USB boot loader.
Rebuilding OpenCore After macOS Update
Once macOS is installed, it may overwrite parts of your EFI or reset settings. Open the patcher again and choose the Post-Install Root Patch option. This rebuilds OpenCore to work smoothly with your newly updated system. It’s like giving your Mac a fresh coat of polish after a renovation.
Handling System Integrity and Patch Requirements
Some updates re-enable System Integrity Protection (SIP), which can block OpenCore from working right. You’ll need to disable SIP again if that happens. Also, don’t forget to reapply any required kernel extensions or patches,especially for graphics and Wi-Fi support.
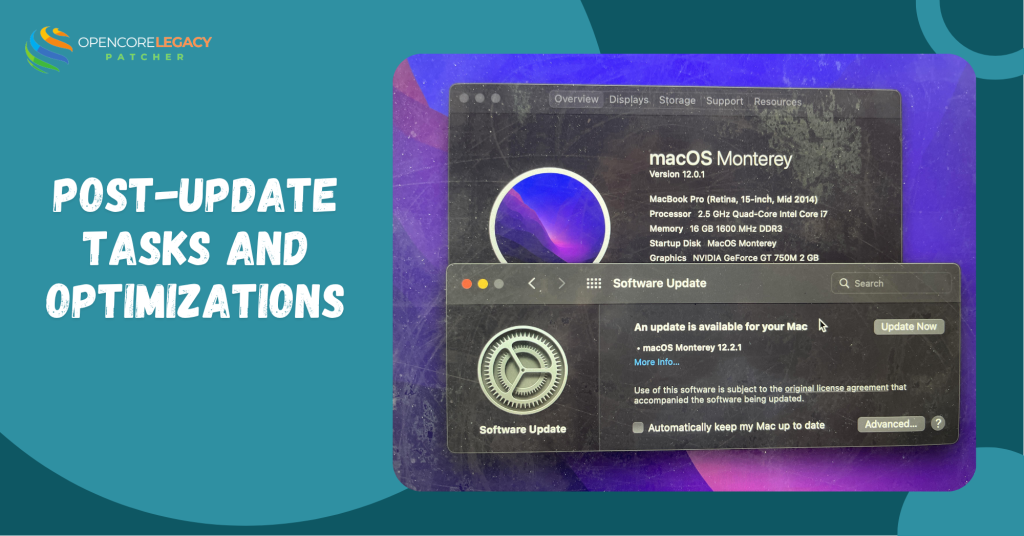
Post-Update Tasks and Optimizations
Congrats, you’re updated! But we’re not done just yet. Let’s make sure everything is running as perfectly as it should.
Verifying System Stability and Features
Take some time to test your Mac. Open apps, check system settings, and see if your usual workflow feels smooth. Pay special attention to Wi-Fi, Bluetooth, sound, and display resolution; these are common areas that might need post-update attention.
Reapplying Missing Patches or Drivers
If something doesn’t work as expected, go back into OpenCore Legacy Patcher and reapply missing patches. Use the Post-Install Root Patch tool again if you skipped it. Most bugs at this stage are due to leftover patch settings that just need a refresh.
Common Issues During the Update
Even with careful planning, things can get tricky. Here’s how to handle those little update gremlins.
Troubleshooting Boot or Graphics Problems
If your Mac gets stuck at startup, try booting into recovery or safe mode. Sometimes, the bootloader needs to be reinstalled manually through a USB or external drive. For graphics glitches, reapplying GPU patches often fixes weird screen flickers or black displays.
Fixing Failed Installations or Errors
Did your update stop midway or fail to install? No worries! Try restarting the Mac and running the update again. If it still won’t work, make sure you have enough disk space and that your OpenCore settings are aligned with the new macOS version.
When to Avoid Updating macOS
As tempting as a new macOS version may be, there are times when it’s better to wait. Here’s why patience might be your best tech move.
Risks of Updating Too Soon
New macOS releases can be buggy, especially for unsupported Macs. Some updates might temporarily break patches or disable key features like Wi-Fi or graphics. Jumping in too early might turn your Mac into a test subject,not ideal if you need stability.
Waiting for Stable Patch Releases
It’s usually best to hold off until the OpenCore community confirms a version is stable for your Mac. Developers are super fast at fixing things, but giving them a bit of time ensures your update experience is buttery smooth instead of buggy and stressful.
No More Limits! Use OpenCore to Maximize Your Mac’s Potential
Patch Smarter, Not Harder—Get the Tools You Need for Modern macOS on Older Hardware!
Rolling Back or Reverting Updates
Sometimes updates just don’t go as planned. Whether you’re facing bugs or performance drops, rolling back can save the day.
Restoring from Time Machine Backup
If you made a Time Machine backup before updating (yay you!), restoring is super easy. Restart your Mac and hold Command + R to boot into Recovery Mode. From there, select “Restore from Time Machine Backup,” pick your latest backup, and follow the steps. It’ll take some time, but your Mac will return to exactly how it was—no stress.
Reinstalling a Previous Version of macOS
Didn’t back up? Don’t worry—it’s still possible to downgrade manually. You’ll need a bootable installer of the older macOS version and possibly a second Mac or USB drive to help.
Just erase your current macOS partition using Disk Utility, then reinstall the older macOS version from the bootable drive. Afterward, repatch using OpenCore Legacy Patcher to ensure your Mac runs smoothly again.
Conclusion: Keeping Your Mac Fresh with OpenCore Legacy Patcher
Updating macOS on an unsupported Mac used to be a no-go. But thanks to OpenCore Legacy Patcher, older Macs are back in the game! Whether you’re staying current or experimenting with newer macOS versions, the patcher gives your Mac the life extension it truly deserves.
Just remember to update wisely—back up first, double-check compatibility, and take your time. And if anything goes wrong, OpenCore’s tools and community have your back. Keep patching, stay fresh, and enjoy the Mac you love for years to come.
FAQs
What is OpenCore Legacy Patcher used for during macOS updates?
It helps older Macs bypass Apple’s limitations, letting you install newer macOS versions and keep everything running smoothly.
Can I update macOS normally after installing OpenCore Legacy Patcher?
Yes, but you’ll often need to reapply patches or rebuild OpenCore afterward to ensure everything works as it should.
Is it safe to update macOS using OpenCore Legacy Patcher?
Generally, yes—especially if you follow all prep steps like backups and version checks. Just avoid updating right after a new macOS release.
Do I need to repatch OpenCore after a macOS update?
Yes, in most cases. Updates can reset or remove parts of the patch, so it’s important to rebuild OpenCore post-install.
What happens if I skip a macOS update?
Nothing major. You can stay on your current version until the next patch release is stable or you’re ready to upgrade.
Can I lose data when updating with OpenCore Legacy Patcher?
It’s rare, but always possible with major OS changes. Always back up your files before any update.
Will updating macOS break OpenCore Legacy Patcher?
It might temporarily disrupt it, especially if SIP or EFI settings are altered. But you can fix this by reinstalling or repatching.
Can I downgrade if the update doesn’t work well?
Yes! Use a Time Machine backup or bootable macOS installer to roll back to a previous version if needed.
Read More: